
Step By Step Guide: How to Re-wax Your Barbour Jacket
Re-Waxing guide for the much-loved Barbour Jacket – Protect yours and never experience its absence in your wardrobe again.
Home quarantine has become the norm for a lot for us over the last few weeks and keeping yourself occupied and busy has become a task in itself. Well, what better way to utilise the hours than to give your favourite Barbour jacket some much needed TLC.
So to help you out we have put together a step by step guide to help you through the (sometimes daunting) task of rewaxing your Barbour jacket at home.
Before we start:
A few quick pointers to take note of:
- Fully read the instructions on the tin of your chosen wax product
- The step by step guide will explain clearly the process of reviving your Barbour jacket and what wax is recommended however, it is always important to still read the instructions on the product you’re using for further clarity.
- Always carry out the re-waxing process in a safe and suitable environment
- And finally, keep all wax-products out of the reach of children!
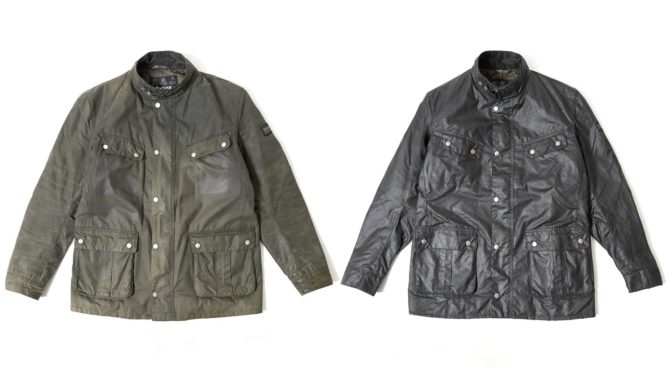
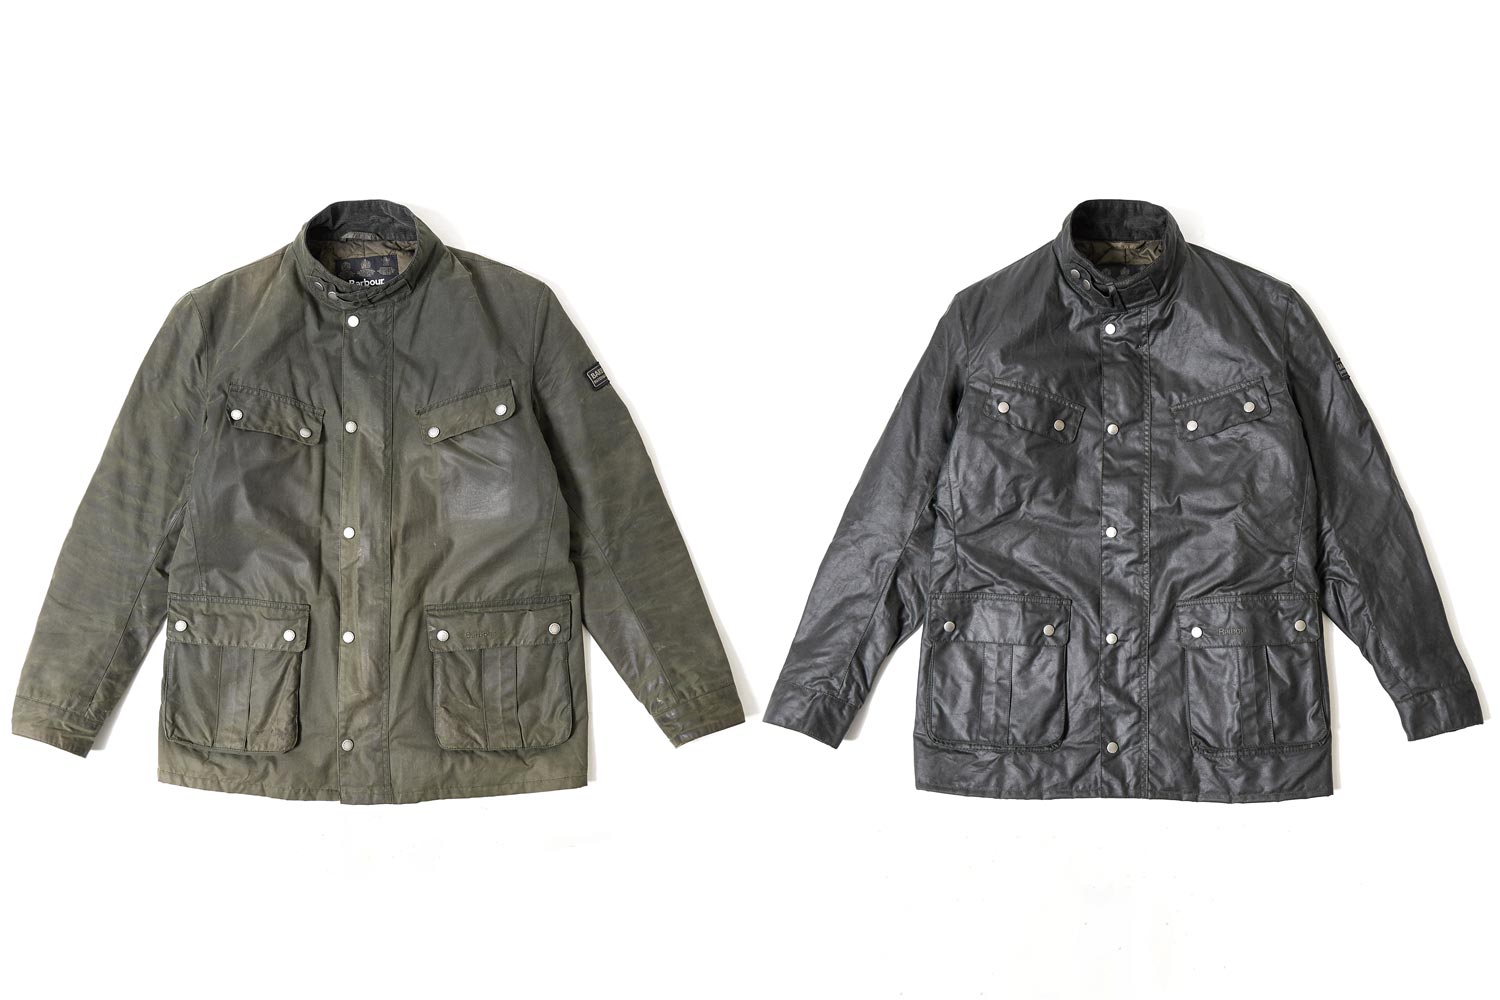
Before and After Images

Beginning the journey to reviving your Barbour Jacket:
What you will need
- Waxed Jacket
- Barbour Thornproof Wax
- Sponge
- Hot water
- Heat resistant container
- Old cloth
- Hair dryer
Step 1 | Clean your Jacket...
You may enjoy a relaxing hot bath but remember your Barbour Jacket does not! This means washing machines are a no go – Instead carefully wipe the outside of your jacket using simply a sponge and cold water. No soap is necessary (no matter how luxurious it smells) it will remove the wax coating permanently, making it impossible to re-wax, causing steps 2 to 5 to no longer be relevant to you.
Step 2 | Soften the wax…
Take a tin of Barbour Wax Thornproof dressing. Haven’t yet purchased this? Not to worry you are in the right place! Once you have your wax, remove the lid and carefully stand the tin in a container of hot water. If you are currently questioning ‘how hot?’ – Just hot enough to soften the wax will do. It should take approximately 20 minutes to melt the wax into a complete liquid consistency.
Step 3 | Wax your jacket…
Now for the main event. Using an old cloth, work the melted wax well into the jacket paying close attention to the seams, creases and any dry patches. You should keep the wax tin in the hot water and top this up accordingly to ensure the wax remains soft. Wipe off any excess wax as you work and be sure to keep the wax away from the corduroy collar, the inside of the jacket and its pockets.
Step 4 | Dry Your Jacket…
Here’s to a trick of the trade – Use a hairdryer to even out the spread of wax and ensure for an extra smooth finish as your jacket dries!
Allow your jacket to dry overnight in a warm place hung away from other garments. Be aware your newly waxed jacket may lose excess wax for a short while so take extra care around other leather and upholstery.
Step 5 | Wear, Wax, Repeat!
Don’t forget to re-wax your jacket annually.
Characterised by its timeless identity and adept weather protection properties your Barbour Jacket takes care of you all year round – Now is the time to return the favour and give your tattered Barbour the home spa treatment it deserves.
We hope this feature has served clarity to the caring for your timeless Barbour classic. However, if after exploring these 5 simple steps you are still not convinced the re-wax is necessary then the before and after pictures speak for themselves – Don’t let your investment piece go to waste. We may not be able to promise your Barbour Jacket an infinite place in your outdoor-loving wardrobe BUT, if looked after it will last the years and serve every environment encountered, potentially even styling the next generation.